Search This Blog

Free Crochet Pattern- 18" Doll Hat, Scarf and Coat Set | Free Crochet Pattern

18 inch Doll Winterwear/ Outerwear Set 
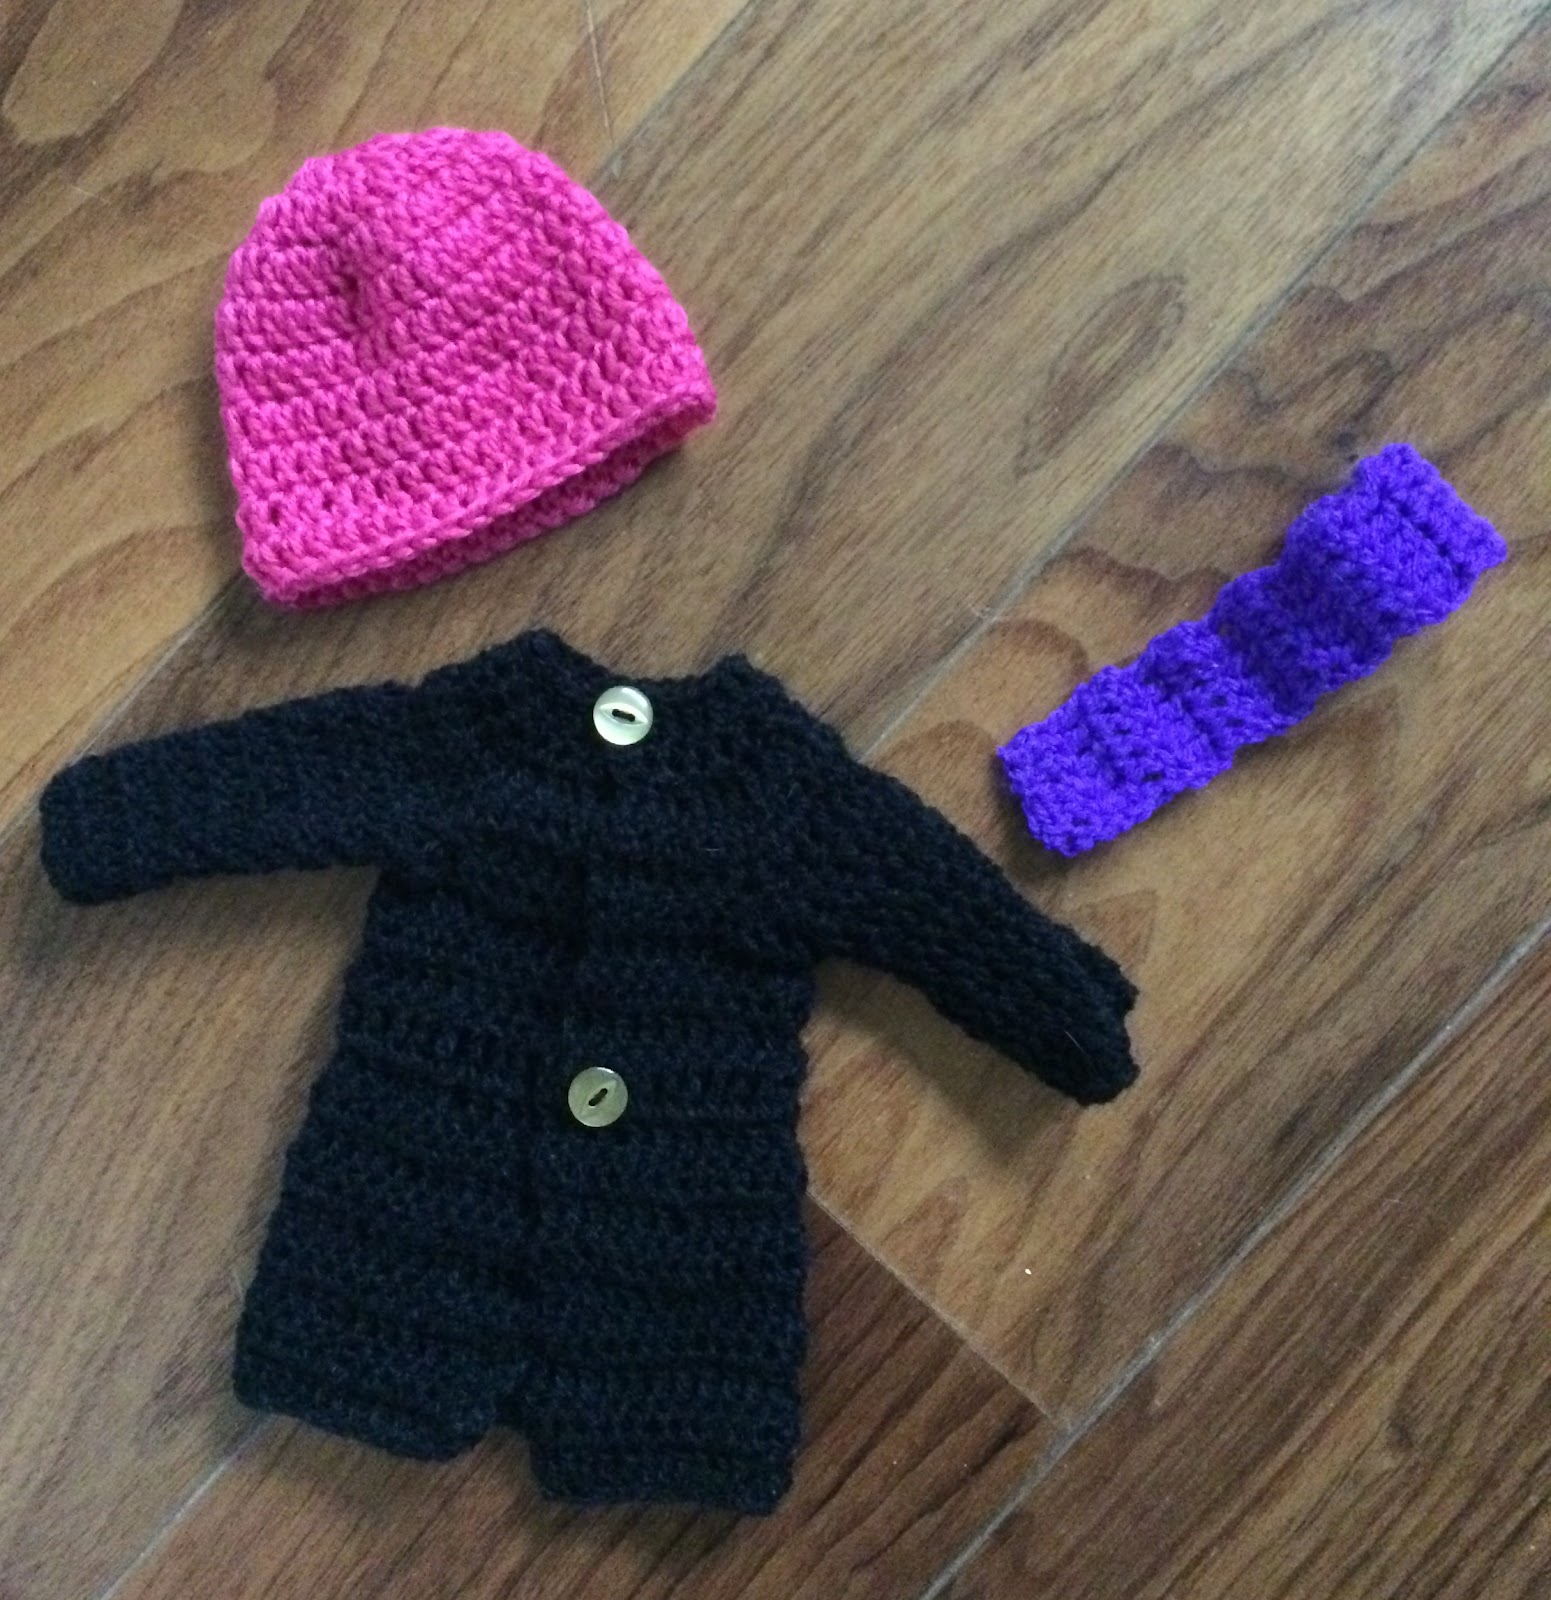
Made to fit an 18 inch doll, such as American Girl, Our Generation, Designafriend or Journey Girl, this set includes a black buttoned coat, a pink beanie hat and a purple scarf. This outerwear set is a quick, beginner-friendly project, that makes a perfect gift for a child with a doll, perhaps alongside other doll clothing pieces from my Ravelry store or blog. It is both easy, quick and fun to make. The set can be finished in around an hour.

You will need
Yarn needle
4.5 MM Crochet hook
2 small buttons (omit for babies)
Stylecraft Special DK in Raspberry, Violet and Black

Difficulty- Easy-intermediate
Size- To fit 18 inch doll, such as American Girl doll, Designafriend, Our Generation

Pattern
Coat
With Black, chain 50
Row 1) Double crochet in 3rd chain from hook, double crochet in each stitch
Row 2-8) Chain 2, double crochet in each stitch
Row 9) Chain 2, *double crochet in 5 stitches, double crochet two together, repeat from *
Row 10) Chain 3, treble crochet in each stitch
Row 11-14) Chain 2, double crochet in each stitch
Row 15) Chain 2, double crochet in 7 stitches, chain 12, skip 6 stitches, double crochet in 14 stitches, chain 12, skip 6 stitches, double crochet in 7 stitches.
Row 16) Chain 2, double crochet in each stitch.
Row 17)Chain 2, *double crochet in 2 stitches, double crochet two together, repeat from *
Row 18) Chain 2, *double crochet in 1 stitch, double crochet two together, repeat from *
Row 19) Chain 2, double crochet in each stitch. 

Sleeves
Fasten yarn on corner of sleeve hole. 
Round 1) Chain 2, double crochet in each stitch, make one stitch into the side of the double crochets.
Round 2-9) Chain 2, double crochet in each stitch, slip stitch to first stitch. Repeat for other sleeve.
Sew buttons on row 1 and row 10. Fasten off and weave in ends.

Scarf
With Violet, chain 3
Row 1) Double crochet in 3rd chain from hook, double crochet in each stitch
Row 2-30) Chain 2, double crochet in each stitch. Fasten off and weave in ends.

Hat
With Raspberry, chain 3
Round 1) 12 double crochet in 3rd chain from hook, slip stitch to first stitch
Round 2) Chain 2, 2 double crochet in each stitch, slip stitch to first stitch.
Round 3) Chain 2, *double crochet in 1 stitch, 2 double crochet in next stitch* repeat around
Round 4-9) Chain 2, double crochet in each stitch, slip stitch to first stitch. Fasten off and weave in ends.

If you are enjoying looking through my blog, please consider supporting me by purchasing from my Ravelry store. If you use the code CherryandCrochetDesignsBlog, you get 50% off! I donate 10% of my revenue to the National Trust, a conservation charity. By financially supporting me, you allow me to devote more time to writing patterns and sharing them on this blog for everyone. Thank you!!!

Thank you for visiting Cherry and Crochet Designs. Please comment to let me know what you think of this pattern. 

Free Crochet Pattern- 18" Doll School/Work Outfit | Cherry and Crochet Designs


18 inch Doll School/Work Outfit 

Made to fit an 18 inch doll, such as American Girl, Our Generation, Designafriend or Journey Girl, this set includes a white blouse, black skirt, black slip on shoes and pink jumper. This school/work wear set is a quick, beginner-friendly project, that makes a perfect gift for a child with a doll, perhaps alongside other doll clothing pieces from my Ravelry store or blog. It is both easy, quick and fun to make. The set can be finished in around an hour.

You will need
Yarn needle
4.5 MM Crochet hook
1 small white button (omit for babies)
Stylecraft Special DK in Shrimp, White and Black

Difficulty- Easy-intermediate
Size- To fit 18 inch doll, such as American Girl doll, Designafriend, Our Generation

Pattern
Skirt
With Black, chain 44, join to first chain with slip stitch
Round 1) Chain 2, double crochet in each chain, slip stitch to first stitch.
Round 2) Chain 2, *double crochet in 2 stitches, 2 double crochet in next stitch, repeat from* around. Slip stitch to first stitch.
Round 3-10) Chain 2, double crochet in each stitch, slip stitch to first stitch. Fasten off and weave in ends.

Blouse
With White, chain 48, join to first chain with slip stitch.
Round 1-6) Chain 2, double crochet in each stitch, slip stitch to first stitch.
Row 7) Chain 2, double crochet in 7 stitches, chain 12, skip 6 stitches, double crochet in 21 stitches, chain 12, skip 6 stitches, double crochet in 8 stitches. Row 8-9) Chain 2, double crochet in each stitch.
Row 10) Chain 2, *double crochet in 2 stitches, double crochet 2 together in next stitch. Repeat from * around.
Row 11) Chain 2, * double crochet in 1 stitch, double crochet 2 together in next stitch, repeat from * around.
Row 12) Chain 2, double crochet in each stitch. Fasten off and weave in ends. Sew button on top of blouse.

Jumper
With Shrimp, chain 50, slip stitch to first chain.
Round 1-6) Chain 2, double crochet in each stitch, slip stitch to first stitch.
Round 7) Chain 2, double crochet in 10 stitches, chain 12, skip 6 stitches, double crochet in 21 stitches, chain 12, skip 6 stitches, double crochet in 10 stitches, slip stitch to first stitch.
Round 8) Chain 2, double crochet in each stitch, slip stitch to first stitch.
Round 9) Chain 2, *double crochet in 2 stitches, double crochet 2 together in next stitch. Repeat from * around, slip stitch to first stitch.
Round 10) Chain 2, * double crochet in 1 stitch, double crochet 2 together in next stitch, repeat from * around, slip stitch to first stitch. Fasten off and weave in ends.
Fasten on at corner of sleeve.
Round 1) Chain 2, double crochet in each stitch, double crocheting once in the side of double crochet stitches. Slip stitch to first stitch.
Round 2-5) Chain 2, double crochet in each stitch, slip stitch to first stitch. Fasten off and repeat for other sleeve. Weave in ends.


Shoes (Make 2)
Chain 14
Round 1) Double crochet in 3rd stitch from hook and each chain after. 6 double crochet in end chain, then double crochet on the bottom of each chain, therefore creating an oval. Slip stitch to first stitch.
Round 2) Chain 2, double crochet in front loop only, slip stitch to first stitch.
Round 3) Chain 2, double crochet in each stitch, slip stitch to first stitch.
Round 4) Chain 2, double crochet in 4 stitches. Fasten off, leaving a tail for sewing. Whipstitch the tab to the other side of the shoe and the toe. Weave in ends.

If you are enjoying looking through my blog, please consider supporting me by purchasing from my Ravelry store. If you use the code CherryandCrochetDesignsBlog, you get 50% off! I donate 10% of my revenue to the National Trust, a conservation charity. By financially supporting me, you allow me to devote more time to writing patterns and sharing them on this blog for everyone. Thank you!!!


Free Crochet Pattern- Pink and Purple Baby Beanie | Cherry and Crochet Designs

I partake in affiliate programs and therefore I may make a small commission if you purchase through links, at no extra cost to you.
Pink and Purple Baby Beanie by Cherry and Crochet Designs

This baby hat is sized for newborns and can be created in under an hour. With pink and purple striped ‘v’s, this adorable baby beanie is an ideal gift for a newborn baby and is very easy to create. It requires only a small amount of yarn, meaning you can use up scraps and create a beautiful present. It would also make an ideal project to make and sell or give as a present at a baby shower.

You will need
Yarn needle
4.5 MM Crochet hook
Stylecraft Special DK in Lemon, Plum and Fondant

Difficulty- Easy-intermediate
Size- To fit newborn

Pattern
With Lemon chain 3,
Round 1) 15 double crochet in 3rd chain from hook, slip stitch to first stitch.
Round 2) Chain 2, “double crochet, chain 1, double crochet” in each stitch, slip stitch to first stitch.
Round 3) Chain 2, *“double crochet, chain 1, double crochet” in chain 1 space, then in between V’s, then in next chain 1 space*, repeat from *to* around, slip stitch to first stitch. Change to Fondant in last stitch.
Round 4-9) Chain 2, “double crochet, chain 1, double crochet” in each chain 1 space, slip stitch to first stitch. Change to Lemon in last stitch of round 4, to Plum in last stitch of round 5, to Lemon in last stitch of round 6, to Fondant in last stitch of round 7, to Lemon in last stitch of round 8.
Round 5-9) Chain 2, 2 double crochet in each gap between clusters, slip stitch to first stitch.
Round 10) Chain 2, double crochet in each stitch, slip stitch to first stitch. Fasten off and weave in ends.

If you are enjoying looking through my blog, please consider supporting me by purchasing from my Ravelry store. If you use the code CherryandCrochetDesignsBlog, you get 50% off! I donate 10% of my revenue to the National Trust, a conservation charity. By financially supporting me, you allow me to devote more time to writing patterns and sharing them on this blog for everyone. Thank you!!!

Please comment if you have any ideas for future patterns or issues.

Free Crochet Pattern- 18" Doll Victorian Outfit | Free Crochet Pattern

18 inch Doll Victorian Outfit by Cherry and Crochet Designs

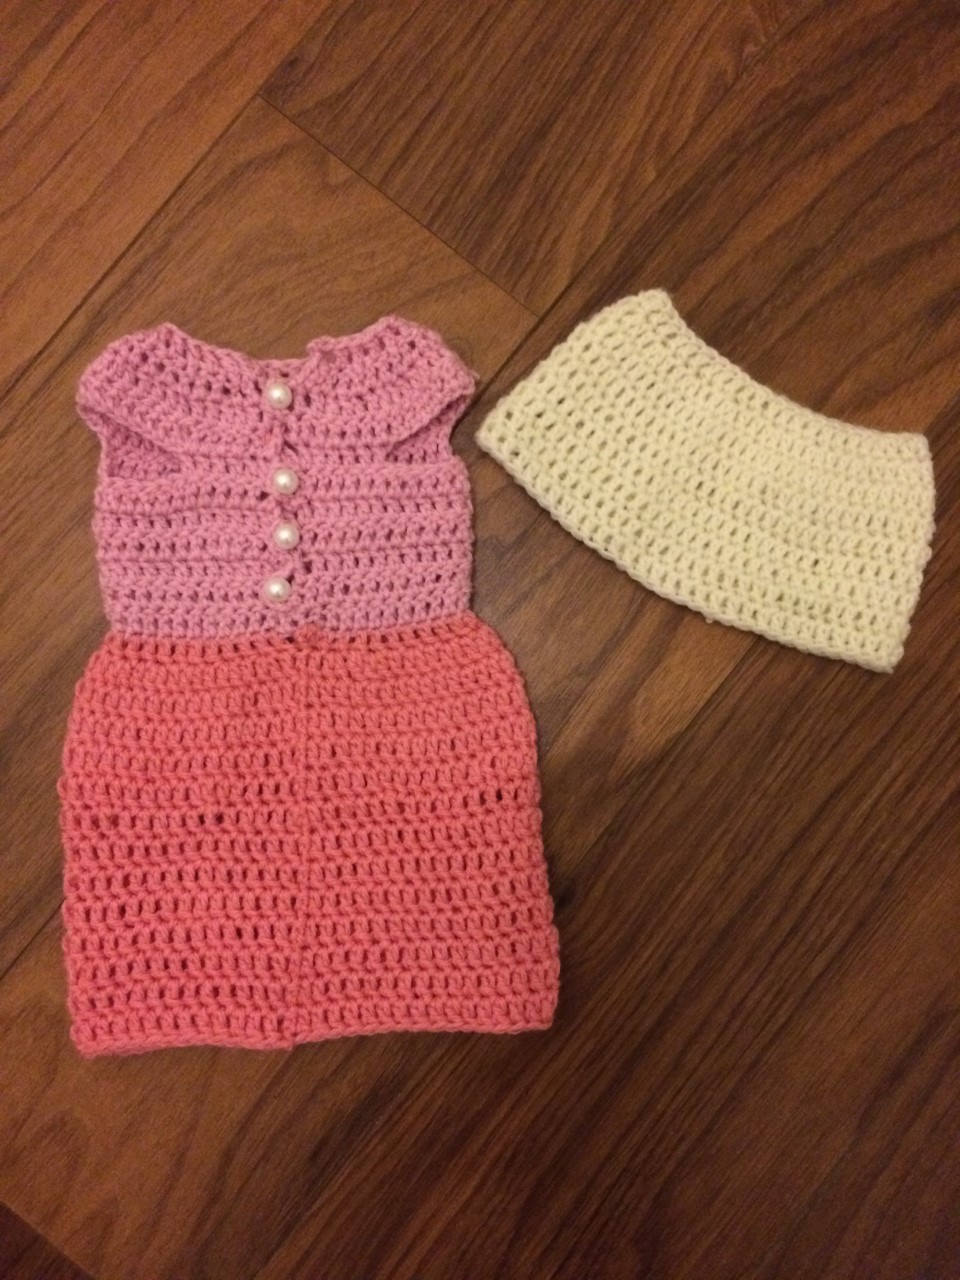
Made to fit an 18" doll, such as American Girl, Our Generation, Designafriend or Journey Girl, this old fashioned dress and shawl set is a quick, beginner-friendly project, that makes a perfect gift for a child with a doll, perhaps alongside other doll clothing pieces from my Ravelry store or blog. This pattern includes the pattern for a Victorian/Edwardian dress and a cream shawl. It is both easy, quick and fun to make. The set can be finished in around an hour.

You will need
Yarn needle
4.5 MM Crochet hook
4 small pearl shaped buttons (omit for babies)
Stylecraft Special DK in Shrimp, Cream and Fondant

Difficulty- Easy-intermediate
Size- To fit 18 inch doll, such as American Girl doll, Designafriend, Our Generation

Pattern
Dress
With Fondant, chain 49, join to first chain with slip stitch
Round 1) Chain 2, double crochet in each chain, slip stitch to first stitch.
Row 2-6) Chain 2, double crochet in each stitch, don’t join to first stitch.
Row 7) Chain 2, double crochet in 6 stitches, chain 12, skip 6 stitches, double crochet in 25 stitches, chain 12, skip 6 stitches, double crochet in 6 stitches.
Row 8-9) Chain 2, double crochet in each stitch or chain. n off and weave in ends.
Row 10) Chain 2, *double crochet in 2 stitches, double crochet 2 together. Repeat from * around.
Row 11) Chain 2, *double crochet in 1 stitch, double crochet 2 together. Repeat from * around.
At the end of the row, single crochet in the side of row 11 and 10, *then chain 5, skip a row, single crochet in the side of 2 rows* repeat this until the bottom round.
Chain 5 and slip stitch to the first round. Fasten off and weave in ends. Sew the 4 buttons on opposite the button loops.

Skirt of dress
With Shrimp, attach the yarn to the first stitch of round 1 of the dress.
Round 1) Chain 2, double crochet in the bottom of each stitch. Slip stitch to first stitch
Round 2) Chain 2, *double crochet in 1 stitch, 2 double crochet in next stitch. Repeat from * around. Slip stitch to first stitch.
Round 3-6) Chain 2, double crochet in each stitch, slip stitch to first stitch.
Round 7) Chain 2, *double crochet in 5 stitches, double crochet 2 together in next stitch. Repeat from * around. Slip stitch to first stitch.
Round 8-14) Chain 2, double crochet in each stitch. Slip stitch to first stitch. Fasten off and weave in ends.

Shawl
With Cream, chain 46, join to first chain with a slip stitch
Round 1) Chain 2, double crochet in each chain, slip stitch to first stitch.
Round 2) Chain 2, *double crochet in 2 stitches, 2 double crochet in next stitch, repeat from * around, slip stitch to first stitch.
Round 3-9) Chain 2, double crochet in each stitch, slip stitch to first stitch. Fasten off and weave in ends.

If you are enjoying looking through my blog, please consider supporting me by purchasing from my Ravelry store. If you use the code CherryandCrochetDesignsBlog, you get 50% off! I donate 10% of my revenue to the National Trust, a conservation charity. By financially supporting me, you allow me to devote more time to writing patterns and sharing them on this blog for everyone. Thank you!!!

Thank you for visiting Cherry and Crochet Designs. Please comment to let me know what you think of this pattern, would you like more doll clothing patterns?

Free Crochet Pattern- Quick and Easy Slippers | Cherry and Crochet Designs

Quick and Easy Slippers
I partake in affiliate programs and therefore I may make a small commission if you purchase through links, at no extra cost to you.


These slippers take around an hour each, making them an ideal last minute gift. They are easy for beginners and can be made using any double knitting yarn. An applique would look great on the toe to really make them stand out. They are a generic medium size, so they should fit most sizes, however, you can size up the hook if you need them to be bigger or use a smaller hook if you want them to be smaller. 

You will need
Yarn needle
5 MM Crochet hook
Pink double knitting yarn and a small amount of red double knitting yarn

Difficulty- Easy
Size- Medium

Pattern

With Pink, chain 3
Round 1) 12 double crochet in 3rd chain from hook, slip stitch to first stitch
Round 2) Chain 2, 2 double crochet in each stitch, slip stitch to first stitch
Round 3) Chain 2, "2 double crochet in stitch, 1 double crochet in each of the next 2 stitches" Repeat around and slip stitch to first stitch
Round 4-7) Chain 2, double crochet in each stitch, slip stitch to first stitch
Round/row 8) Chain 2, double crochet in 19 stitches, turn
Row 9 -21) Chain 2, double crochet in each stitch

Hold the row together to join the two ends and slip stitch along, creating the back of the slipper. Turn inside out once finished to hide the seam and fasten off.

Join red yarn at the top of the heel of the slipper and make 2 single crochet in the side of each double crochet and 1 in each of the tops of the double crochets at the toe. Slip stitch to first stitch of round and fasten off.

Weave in ends.

If you are enjoying looking through my blog, please consider supporting me by purchasing from my Ravelry store. If you use the code CherryandCrochetDesignsBlog, you get 50% off! I donate 10% of my revenue to the National Trust, a conservation charity. By financially supporting me, you allow me to devote more time to writing patterns and sharing them on this blog for everyone. Thank you!!!

Please comment your thoughts on this pattern, if you have any issues or ideas for future patterns. 

Free Crochet Pattern- Lion Baby Beanie | Cherry and Crochet Designs

Lion Baby Beanie by Cherry and Crochet Designs
I partake in affiliate programs and therefore I may make a small commission if you purchase through links, at no extra cost to you.
This baby hat is sized for newborns and can be created in under an hour. With a cheeky lion  face, this baby beanie is an ideal gift for a newborn baby and is very easy to create. It requires only a small amount of yarn, meaning you can use up scraps and create a beautiful present. Deceivingly easy, it would also make an ideal project to make and sell or give as a present at a baby shower.

You will need
Yarn needle
4.5 MM Crochet hook
Stylecraft Special DK in Citron, Jaffa, Black and Stone

Difficulty- Easy
Size- 12cm x 10cm (To fit newborn)

Pattern

Bobble- Work double crochet, leaving two loops on the hook at the end, then work another 7 unfinished double crochet into the same stitch, pull through all loops on hook on last stitch.

With Citron , chain 3,
Round 1) 15 double crochet in 3rd chain from hook, slip stitch to first stitch. (15)
Round 2) Chain 2, 2 double crochet in each stitch, slip stitch to first stitch. (30)
Round 3) Chain 2, “2 double crochet, double crochet in next stitch” repeat around, slip stitch to first stitch. (45)
Round 4)Chain 2, double crochet in each stitch, slip stitch to first stitch. (45)
Round 5) Chain 2, double crochet in 10 stitches, bobble in Black,double crochet in 10 stitches using Citron, bobble in Black, double crochet in each remaining stitch using Citron, slip stitch to first stitch. (45)
Round 6-10) Chain 2, double crochet in each stitch, slip stitch to first stitch. (45).
Fasten off and weave in ends.

Mouth
With Citron , chain 5,
Round 1) double crochet in 3rd chain from hook, double crochet in each chain, 6 double crochet in end chain, double crochet in bottom of each chain, 6 double crochet in last stitch, slip stitch to first stitch. Fasten off, leaving a tail for sewing. Complete nose, then sew onto hat as pictured above.

Nose
With Stone, chain 2
Row 1) 2 single crochet in 2nd chain from hook
Row 2) Chain 2, 2 single crochet in each stitch.
Row 3) Chain 2, 2 single crochet in first stitch, single crochet in each stitch, 2 single crochet in last stitch. Fasten off, leaving a tail for sewing. Sew onto mouth as in picture above.

Mane
With Jaffa, chain 65
Row 1) Slip stitch to 3rd chain from hook, “chain 5, skip a stitch, slip stitch in next stitch”, repeat from “to”. Fasten off and sew onto hat using tail. Weave in ends.

Ears (Make 2)
With Citron, chain 2.
Row 1) Chain 1, 2 single crochet in stitch
Row 2) Chain 1, 2 single crochet in each stitch
Row 3-4) Chain 1, 2 single crochet in first stitch, single crochet in each stitch, 2 single crochet in last stitch.
Row 5) Chain 2, double crochet in each stitch. Chain 1, single crochet around ear. Fasten off, leaving a tail for sewing. Sew onto hat as pictured above. Weave in ends.

If you are enjoying looking through my blog, please consider supporting me by purchasing from my Ravelry store. If you use the code CherryandCrochetDesignsBlog, you get 50% off! I donate 10% of my revenue to the National Trust, a conservation charity. By financially supporting me, you allow me to devote more time to writing patterns and sharing them on this blog for everyone. Thank you!!!

Please comment if you have any issues or ideas for future patterns.

Free Crochet Pattern- Little Mouse Doll | Cherry and Crochet Designs

Little Mouse Doll
I partake in affiliate programs and therefore I may make a small commission if you purchase through links, at no extra cost to you.


This little mouse is a fun, easy project that can be made in around half an hour. It makes a perfect gift and is small enough to fit in the palm of your hand. This pattern, like most of my other patterns, is written in full terms, no abbreviations, making it a perfect first project for beginners. There are more animals in the "Little animals" collection.

You will need
Small amount of fiberfill
Black sewing thread
Yarn needle
3.5 MM Crochet hook
Stylecraft Special DK in Camel and a scrap of Fiesta

Difficulty- Easy
Size- 5.5cm x 3cm

Pattern

Body
Chain 2
1) 8 single crochet in 2nd chain from hook, slip stitch to 1st stitch
2) Chain 1, single crochet in same stitch, 2 single crochet in each stitch, slip stitch to 1st stitch
3-8) Chain 1, single crochet in each stitch, slip stitch to 1st stitch. At the end of round 8, stuff with fiberfill until you can’t get any more in.
9) Chain 1, single crochet 2 together in each stitch , slip stitch to first stitch.
10-11) Chain 1, “single crochet 2 together, single crochet”, repeat around, slip stitch to first stitch
12) Chain 1, single crochet 2 together in each stitch. Fasten off

Ears
With camel,
Chain 2, 3 single crochet in 2nd chain from hook. Fasten off and sew the bottom of the ears onto the body

Eyes
With black sewing thread, repeatedly sew a stitch 8 times in round 9, repeat again 2 stitches to the right.


Whiskers
Using the pictures as a guide, sew 3 stitches with black sewing thread making them join at a point, repeat again on the other side

Nose
With fiesta, stitch the gap in between the whiskers

Tail
Using the end from the body, thread a needle and poke it through the 8 single crochet from round 1

Weave in the ends by threading a yarn needle with the end and poking it into the body, so it is part of the stuffing.

If you are enjoying looking through my blog, please consider supporting me by purchasing from my Ravelry store. If you use the code CherryandCrochetDesignsBlog, you get 50% off! I donate 10% of my revenue to the National Trust, a conservation charity. By financially supporting me, you allow me to devote more time to writing patterns and sharing them on this blog for everyone. Thank you!!!

Please comment if you have any issues or ideas for future patterns. 

How to Make a Granny Square Blanket | Cherry and Crochet Designs

An easy first crochet project, a granny square blanket is a gorgeous gift and very rewarding to create. In this post, I'll share how to make one, from creating the squares to edging them and joining them together.
I partake in affiliate programs and therefore I may make a small commission if you purchase through links, at no extra cost to you.
This is a blanket I made for a family member as a gift.

In this easy to follow, step by step guide, I've explained how to create a gorgeous granny square blanket. I've fully explained how to calculate the size you want and how many squares you need, even including links to places where you can find tutorials for granny squares and how best to join the squares together. I've made several for gifts and they are always well received. It can also be used as a throw, as a picnic blanket or a baby blanket.

I've broken the process down into several steps

Step 1) Planning

First of all, work out how big you would like the blanket to be. There are tables online which show the size of regular blankets, so these can be useful for determining the measurements of your blanket. Write this down somewhere so you can refer to it later. The next thing to plan is the colour scheme, if you would like one. For example, in the blanket above, the recipient asked for blues, grey and red. Therefore, I chose several shades of blue, grey and red. You could also decide to have no colour scheme and use the colours of yarn you have in your stash.

Step 2) Make a square and calculate how many you need

Before you crochet all your squares, crochet one and measure how big it is, (including the outer edging if you will have edging, like in the picture above). Compare this to the size of the blanket you want and work out how many squares you need. This is easier if you do it in cm than in imperial measures, but you can do both.

For example, if I wanted to make a blanket that is 150cm long by 120cm wide, and one square measured 10cm by 10cm, then I would divide 150 by 10 to get 15 squares long and 120 by 10 to get 12 squares wide. I would then multiply these numbers together to calculate how many squares I needed total. Therefore, I would need 180 squares.

(If this is confusing, comment below and I'll try to help)

If the squares don't come out as a whole number, you could either add or subtract a little bit of the blanket, or crochet another square with a larger or smaller hook size.

If you are looking for stunning, ethical and eco-friendly yarns at lower prices, check out Darn Good Yarn's Factory Outlet, their yarns would make a gorgeous blanket for a gift

Once you have determined how many you need, work out roughly how many of each colour you would like. Such as, would you like more of one colour than another? Do you want a set pattern, eg stripes?

If you have 3 colours and you would like to have an even amount of each, divide your total number of squares by 3 and this is the number of squares you need in each colour.

Step 3) Crochet the squares

After you have done all the calculating, it's time to crochet all the squares!
I always keep a tally of how many squares I've done to avoid doing too many, (this has happened and it is very annoying especially if you are working to a deadline)

If you are unsure on how to crochet a granny square, there are many tutorials online, such as Bella Coco's tutorialWikihow tutorial and many others.

Step 4) Edging and joining the squares

Once you have crocheted all your squares, you can either edge them or begin joining them. There are methods of doing both of these at the same time, but I've always found it easier to edge all the squares, then slip stitch them together. If you don't want an edging on the squares, (I've also done one like this and I like both blankets), you can move straight onto joining them. If you are edging them, simply join the edging yarn where you fastened off and crochet another round.

My favourite way of joining the squares is by laying them out on the floor in rows, then joining the row together by slip stitching along the touching edges of each square. After I have enough rows, I join the rows together to form the blanket.

Step 5) Weaving in ends and finishing
After you have completed your blanket, you will notice that there are lots of little yarn ends. These need to be woven into the blanket to hide them. I always recommend weaving them in as you join the squares together, but I prefer to do it at the end as I don't like stopping the joining together to do something else. It's up to you. If you are unsure on how to weave in ends, there are lots of tutorials online and nearly all crochet books will have a section on how to weave in ends.

Once you have sorted out all the yarn tails, you can either admire your creation, or add an edging around the edge of the entire blanket. This can be nice if there isn't an edging around the squares, but I think it isn't necessary for a blanket if it the squares have been edged already.

Congratulations, you've finished your crochet granny square blanket!

If you are enjoying looking through my blog, please consider supporting me by purchasing from my Ravelry store. If you use the code CherryandCrochetDesignsBlog, you get 50% off! I donate 10% of my revenue to the National Trust, a conservation charity. By financially supporting me, you allow me to devote more time to writing patterns and sharing them on this blog for everyone. Thank you!!!

I would love to hear how your blanket turned out, let me know in the comments section.

If you are struggling with anything, comment and I'll try to help.

Please feel free to save this page if you are working through a blanket and would like it for reference.